
This Delightful Wishes Bundle was my first pick from the new Jan – Apr ‘2025 Mini Catalog and I am just loving it. It is from the Floral Delight Suite Collection and includes such goodies as the Floral Delight 12″ x 12″ DSP, the Floral & Gingham Vellum 12″ x 12″ Specialty Designer Series Paper, Daffodil Delight Satin Ribbon and the cutest little Tiny Bee Trinkets.
All that… plus purchasing the whole collection can earn you a Free Sale-A-Bration item! Not sure how Sale-A-Bration works, just see below.
Sale-A-Bration has just begun and you can earn FREE products with your purchases – now through the end of February! Here’s how: With every $60 or $120 you spend on Stampin’ Up! products (before tax & shipping), you can choose a FREE SALE-A-BRATION product from the Sale-A-Bration brochure (see below).


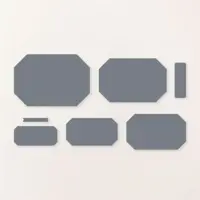
There are so many way to use the beautiful ‘word’ dies in this bundle. For this project, I used both the thin (inner) word die for the Lost Lagoon card stock and the broader (outer) word die for Basic White to make the sentiment pop!
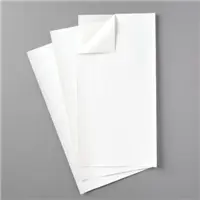
TIP: When using these very thin ‘word’ die cuts, I find it so helpful to use an Adhesive Sheet before die cutting. There is no messy glue and the liner to the Adhesive Sheet pulls off magically for a perfect fit onto the broader die cut.
There is also a cool die that crops out a beautiful design in the card stock to make for a pretty background layer.
I stamped the focal image in Daffodil Delight and Pecan Pie ink using the two-step stamps. I also stamped the sentiment in Pecan Pie ink and cropped it with the tag die in the set.
Maybe you noticed that the tag is smaller than the actual die… that’s because I ran the die over the sentiment once being sure to keep it to one edge and then again just covering the sentiment and placing the die to where I wanted the length of the tag to be.
The focal image was cropped with a die from the Countryside Corners Dies and placed over the embossed background layer. My word die cuts were adhered over the focal image to the right and the sentiment tag was added with Dimensionals to the lower portion of the focal image.

Here are the measurements for this quick and easy project…
- Basic White (thick) CS: 8 1/2″ x 5 1/2″ scored at 4 1/4″
- Lost Lagoon CS: 5 1/4″ x 4″
I hope you liked today’s project created from one of the new products in the January – April 2025 Mini Catalog… the Delightful Wishes Bundle.

I have a tutorial pack available for this Delightful Wishes bundle! Get five additional project tutorials using this beautiful new bundle. Below is a sample of the projects in this pack! Check out my Tutorial Shop for hundreds more Stampin’ Up! project tutorials!

THREE NEW RELEASES RECENTLY!
THE NEW JAN – APRIL 2025 MINI CATALOG
THE BRAND NEW SALE-A-BRATION CATALOG – SHOP & EARN!
BRAND NEW ONLINE EXCLUSIVES

Use the host code: CGNK43DR on all your MARCH Purchases. This code is good on any order under $150. If your order is over $150, you will receive your own (10%) Stampin’ Rewards! You will be prompted to enter your FREE products at checkout.
Any order ($50+) you place with me this month, you will receive a FREE gift and a handmade card as a thank you from me! (If your order is under $50, you will still receive a handmade card from me as a thank you for your order)
My Tutorial Shop is up and running! Check out all the current tutorials in my library! All 2023 & 2024 tutorials are available for INSTANT DOWNLOAD!

Most recent addition to the Tutorial Shop – Hearts of Elegance!


My project supply list! Click products to shop online…


