

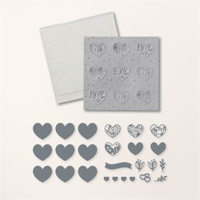
Welcome to our next project in this week’s NEW PRODUCT SHOWCASE – ADORING HEARTS HYBRID EMBOSSING FOLDER from the new JAN – APR ’24 MINI CATALOG!

This week, it’s all about this fantastic ADORING HEARTS HYBRID EMBOSSING FOLDER!
We are starting out with this project today to show two of the fantastic elements of this embossing folder! You can find this Hybrid Embossing Folder on pages 18-19 of the new Mini.

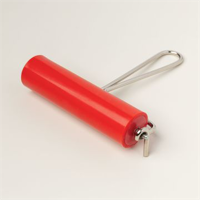
What makes it a Hybrid? Well, it means the dies and embossing folder can be used at the same time! For today’s project, I used both the embossing folder and the dies! And this time, I used the brand new Stampin’ Brayer to add color to the embossed die cuts.
This new product is perfect for adding color to the raised edges of any embossed edge. It also is great for adding color directly onto the inside of an embossing folder. This has a different and more subtle outcome using the folder, but very pretty just the same. Here is a sample of a project using that technique (details for this project will be up on the blog soon)…

If you want to emboss (and/or crop) all nine of the hearts, you will need to start with a piece of card stock that is 6″ x 6″. I did this even though I just needed three hearts for this project… but the rest will be put to good use for sure.
I love this new brayer! Below you can see the process for getting the beautiful inked up images, but I wanted to bring your attention to some really cool things about the brayer.
(This would have been so much easier if I could have just done a quick video for you… but alas, I am still weeks away from being settled in the new house and in my happy place – my stamp room!) So this will have to suffice!
- The red arrows in the graphic are pointing to the ‘feet’ of the brayer. This makes it super easy to keep your stamping surface clean until you are ready to use it! No worries on placing an inked up brayer down on your desk top!
- Once you lift the brayer, you are fine to roll onto the stamp pad in any direction. You may need to re-ink your brayer until you have the desired coverage.
- Be sure that the ‘feet’ are up when you are ready to roll onto the image. It will prevent you from rolling if the feet are down… no biggie, except you may waste a little ink when that happens!
- I ran the brayer under cold water and the ink just disappeared! No wiping required! You could use a wet wipe or paper towel if you are not near a sink.

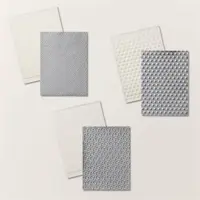
I am so thankful I have my Basics 3D Embossing Folders with me. They are perfect for quiet, subtle backgrounds when you want your focal image to pop!

Here are the measurements for this project:
- Basic White (Thick) CS: 8 1/2″ x 5 1/2″ and score at 4 1/4″
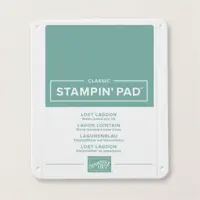
- Lost Lagoon CS: 5 1/4″ x 4″ (round corners if possible)
- Basic White CS: 6″ x 6″
Here is the step-by-step for this project:
- Trim all layers as noted above
- Emboss the Lost Lagoon card stock with the Basics 3D Embossing Folder (round corners if possible)
- Adhere embossed layer to card base
- Run a 6″ x 6″ piece of Basic White card stock through the Stampin’ Cut & Emboss Machine with the Adoring Hearts Hybrid Embossing Folder (#1)
- Crop the hearts with the die and trim the negative space card stock to 5 1/2″ x 2 1/4″ (round corners if possible) (#2, #3)
- Using the new Stampin’ Brayer, add color to the three embossed hearts (#4, #5, #6)
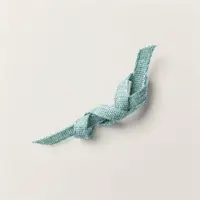
- Wrap the Lost Lagoon Textured Ribbon around the negative-spaced layer and tie a bow
- Adhere the embossed layer to the card front
- Add the three embossed hearts over the negative spaces with dimensionals
- Stamp the sentiment in Lost Lagoon ink, fussy cut around the words and adhere to card front with mini dimensionals
- Add a few Iridescent Pearls to the card front

I hope you liked today’s project from this new and fun Hybrid Embossing Folder and Stampin’ Brayer! Thanks so much for visiting my blog today and I hope you have a wonderful day!
Have you checked out the new January- April ’24 Mini Catalog and the new Sale-A-Bration Freebies? You can SHOP & EARN all during the months of January and February!
CLICK HERE FOR THE DIGITAL VERSION OF THE MINI CATALOG!
CLICK HERE FOR THE DIGITAL VERSION OF THE SAB CATALOG!
I finally have my Tutorial Shop back up and running! Now I can offer an Instant Download for all of my 2024 & 2023 Tutorial Packs! Click here for some FAQ about my Tutorial Shop!

Today’s project is included in the tutorials that can be found in the Adoring Hearts Hybrid Embossing Folder Tutorial Pack! Five (5) projects total! Check out my Tutorial Shop (by clicking below) for this and more 2023 & 24 tutorial packs just added that are available for instant download.
January ’24 Host Code
Use this code on any order under $150. If your order is over $150, you will receive your own (10%) Stampin’ Rewards! You will be prompted to enter your FREE products at checkout.
Any order ($50+) you place with me this month, you will receive a FREE gift and a handmade card as a thank you from me! (If your order is under $50, you will still receive a handmade card from me as a thank you for your order)!


LOLLY POP PAPER AND INK RESOURCES
HOW TO EARN FREE PRODUCTS … with the LollyPop Rewards Program!
(ALMOST) WEEKLY EMAIL INSPIRATION… subscribe to my email list
THE $99 ULTIMATE BUNDLE… join the fun!
SHOP MY STORE… shop online 24/7!
RETIRED PRODUCTS STORE… Shop my retired products at big discounts!
My project supply list. Click to shop products online.


love the way you put your cards
Maureen
Thank you, Maureen!