Hello, welcome to the Stampin’ Pretty Pals’ Blog Hop! This month our Design Team’s theme is “Tag, You’re It” – tags or 3D projects to get you inspired for the upcoming gift season. We hope you enjoy and will be inspired by them! Don’t forget to leave comments! We love hearing from you. At the end of my post, you will find the full line-up to help you “hop” along from Pal to Pal.
Well, I couldn’t make a tag without an adorable bag to go with it! This is my go-to bag which I love because it is so simple to put together and only takes two full 12″ x 12″ sheets of DSP! But I should say my inspiration was the tag… and then came the pretty bag!
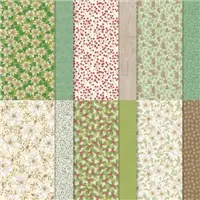
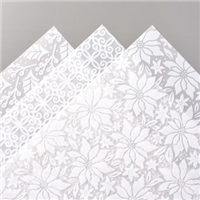
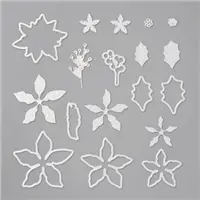
For the tag… I used the beautiful Poinsettia Petals bundle along with the coordinating Poinsettia Place DSP and the Plush Poinsettia Specialty Paper. These products compliment each other so beautifully, the project practically makes itself!
I started with a base of Soft Suede card stock (2″ x 4 1/2″) and layered on the specialty paper after I cropped the top with the Delightful Tag Topper.
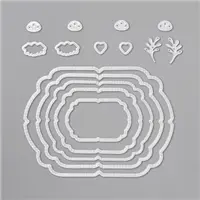
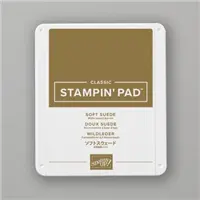
I stamped the sentiment in Soft Suede ink onto a scrap of Whisper White and then cropped with a die from the Celebration Labels Dies. I added the label to the right side of the tag.
I cropped the Poinsettia bloom with the Poinsettia Dies right from the Poinsettia Place DSP! Love when I can do that! (If you don’t have the dies, these images are so easy to fussy cut as I did for the small flower bloom inside the tag). I added the die cut to the left side of the tag with dimensionals.
I trimmed another piece of Soft Suede card stock to 2″ x 5″ and scored at 2.5″. I glued the top flap to the back of the tag. I stamped the ‘to-from’ image onto a trimmed piece of Whisper White scrap and adhered that to the inside of the back flap. I fussy cut a small flower from the DSP and adhered it to the stamped inner flap.
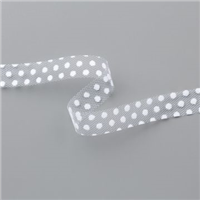
I finished the tag with a pretty bow made from the Polka Dot Tulle Ribbon.
The bag was easy peezy…
Two sheets of the same design 12″ x 12″ DSP were scored at the 2″ mark on one side and at the 3″ mark on the other three sides.
Score and burnish all score lines. Fold over the top 2″ score line to form the top band of the bag.
Cut and remove the bottom 3″ square tabs on ONE sheet.
Cut INTO the SIDE score lines at the bottom 3″ mark on the OTHER sheet.
Adhere the two sheets together by lining up and adhering the large center tab over the large center section of the second sheet.
Fold up and adhere the tabs to form the bag. Use a hole punch to attach a piece of ribbon over the top for a handle.
I did a Facebook Live last week with the same bag/tag idea… but with a different stamp set and DSP. You can click here to see the replay!
More inspiration awaits! Use the Blog Hop Line-up below to visit the rest of this month’s Design Team. My fellow Pals are excited to show you what they’ve created! Mark your calendars for our next blog hop on November 11th when our theme is “Pile It On!” Participants will showcase projects with lots of layers, embellishments and/or texture. Don’t miss the fun! Until then, please stay safe and have fun in your craft space.
Stampin’ Pretty Pals Blog Hop Line-Up
- Mary Fish at Stampin’ Pretty
- Melissa Seplowitz at The Stamping Ninja
- Ann Murray at Murray Stamps Ink
- Stesha Bloodhart at Stampin’ Hoot!
- Karen Buttery at Karen On The Lake Stamper
- Jeanie Stark at Just Stampin’
- Jen Roque at Stamp Camp with Jen
- Lori Pinto at LollyPop Paper and Ink
- Mary Hanson at Up North Stampin’
- Beth McCullough at Stamping Mom
- Tricia Chuba at ButterDish Designs
- Su Mohr at Aromas And Art
- Leah O’Brien at Honey Bee Stamping & More!
- Dacia Smith at My Creative Days
- Rae Harper Burnet at Wild West Paper Arts
- Sue Jackson at Just Peachy Stamping
- Peggy Noe at Pretty Paper Cards
- Debbie Mageed at Secrets to Stamping
- Wendy Klein at Doggone Delightful Stampin’
- Deb Walker at Deb Stamps Life
- Jackie Beers at Blue Line Stamping
- Lisa Ann Bernard at Queen B Creations
- Pamela Sadler at Stampin Pink Rose
- Debbie Crowley at expressively deb…
My project supply list. Click on products to shop online.


This bag is beautiful! It would definitely be a keeper to the recipient. The matching tag is equally as pretty. Thank you for sharing.
Thanks so much, Jackie!
Beautiful bag and tag! An elegant gift.
Thank you, Debbie!
Absolutely Stunning! I am definitely giving your easy peasy bag a try!
Thanks so much, Stesha!
Beautiful work here Lori! Always a pleasure to see how others put their own stamp on life!
Thanks, Deb!
The bag is a gift in itself. Absolutely lovely with the Poinsettia DSP too!
Thank you, Ann!
Beautiful! There’s nothing better than a gorgeous gift bag with a matching tag!!
Thanks so much, Melissa!
So beautiful. Sorry my grandmother isn’t living know. She taught us to decorate Christmas presents. It’s better then the gift inside. Makes it so special! Your bag and tag make me not want to ever open it!
Thanks so much, Sue!
Your project is gorgeous, Lori! Love that bag!
Thanks, Su!
Gorgeous, Lori! What elegant gift bag and tag! I really love how you used the DSP for these.
Stunningly beautiful! Gorgeous gift bag and tag.
Lori, what a beautifully decorated bag and tag. You hit one out of the park. I know your lucky recipient will be overjoyed. Thanks for sharing your wonderful idea with us.
Beautiful gift bag and tag! Stunning! Love your website!
You did a beautiful job with your bag and tag! I’ve done those bags, but with paper handles. I love the idea of using ribbon instead! I will have to try that. Don’t you just love that we can use our Stampin’ Up! supplies to decorate the outside of a gift as well as the inside!?!?